What's Living in Your Attic Is Costing You More Than You Think
Most people treat their attic like a storage unit they forgot to cancel. Boxes of holiday decorations, old yearbooks, maybe a treadmill that never got a second chance — and somewhere underneath all of that, a layer of insulation that may be doing absolutely nothing useful.
Here's the uncomfortable truth: the U.S. Department of Energy estimates that roughly 25% of a home's heating and cooling energy escapes through the roof. That's not a rounding error. That's a quarter of your energy bill vanishing into thin air, month after month, year after year. And unlike a dripping faucet or a cracked window, you can't see it happening.
Let's fix that.
Why Your Attic Is Ground Zero for Energy Loss
Heat moves in a predictable direction — it always travels toward cold. In winter, that means the warmth you're paying to generate inside your home is constantly trying to escape upward, through your ceiling and into the attic. In summer, the process flips: scorching attic air (which can reach 150°F or higher in places like Texas, Arizona, or Georgia) pushes heat downward into your living spaces, forcing your AC to work overtime.
Insulation is what slows that transfer down. But insulation has a lifespan, and it has limits. Old fiberglass batts compress over time and lose their effectiveness. Blown-in cellulose settles. Moisture damage — from a slow roof leak or high humidity — can quietly destroy an insulation layer's performance without leaving any visible sign from below.
The result is a home that feels drafty in January, sweltering in July, and expensive every single month in between.
Signs Your Attic Insulation Is Failing You
You don't need a home energy auditor to get a basic read on your situation. Here are some telltale signs that your attic insulation deserves a closer look:
Uneven room temperatures. If the second floor of your home is noticeably warmer in summer or colder in winter than the ground floor, heat transfer through the ceiling is likely the culprit.
Energy bills that keep climbing. If your heating and cooling costs have crept up year over year without a clear explanation, degraded insulation could be quietly driving that trend.
Ice dams in winter. If you're in a colder climate and you're seeing ridges of ice forming along your roofline after snowfall, that's a classic sign that warm air is escaping through your attic and melting snow unevenly. It's also a precursor to serious water damage.
You can see your attic joists. This is one of the easiest checks you can do yourself. Pop open the attic hatch and look down at the floor. If you can clearly see the tops of the wooden joists, your insulation is almost certainly below the recommended depth. The U.S. Department of Energy recommends R-38 to R-60 for most attics in the continental US, which translates to roughly 13 to 20 inches of blown-in insulation.
The attic is the same temperature as outside. Your attic should be ventilated, yes — but it shouldn't be a thermal copy of the outdoors during extreme weather. If it's 95°F outside and your attic feels identical, you may have a ventilation and insulation problem working together against you.
What It Actually Costs — And What You Get Back
Here's where a lot of homeowners get stuck. Insulation doesn't feel like a glamorous upgrade. It's not a kitchen remodel or a bathroom refresh. You won't see it from the street. But the financial math is hard to argue with.
For a typical 1,500 square foot attic, adding blown-in insulation yourself using rented equipment from a home improvement store like Home Depot or Lowe's runs roughly $500 to $900 in materials. If you hire a contractor, that same job might cost $1,500 to $3,000 depending on your region and the current depth of your existing insulation.
Compare that to the savings. The EPA's ENERGY STAR program estimates that homeowners can save an average of 15% on heating and cooling costs — or around 11% on total energy bills — by properly air sealing and insulating. For a household spending $2,400 a year on energy, that's roughly $264 to $360 back in your pocket annually. A DIY insulation project could realistically pay for itself in under three years.
There's also a resale angle worth considering. Energy efficiency is increasingly a factor buyers look at, and homes with documented upgrades — including attic insulation — tend to appraise better and sell faster in competitive markets.
The DIY Roadmap: How to Tackle This Yourself
Attic insulation is one of the more accessible home improvement projects for a motivated DIYer. It's not glamorous work, but it doesn't require specialized skills. Here's a simplified approach:
Step 1: Seal air leaks first. This is the step most people skip, and it's the most important one. Before you add any insulation, use expanding spray foam or caulk to seal gaps around light fixtures, plumbing penetrations, and the tops of interior walls. Air sealing and insulation work together — one without the other leaves money on the table.
Step 2: Check your current R-value. Measure the depth of your existing insulation and compare it to the DOE's recommended levels for your climate zone (available at energystar.gov). Most of the Midwest and Northeast should be targeting R-49 to R-60.
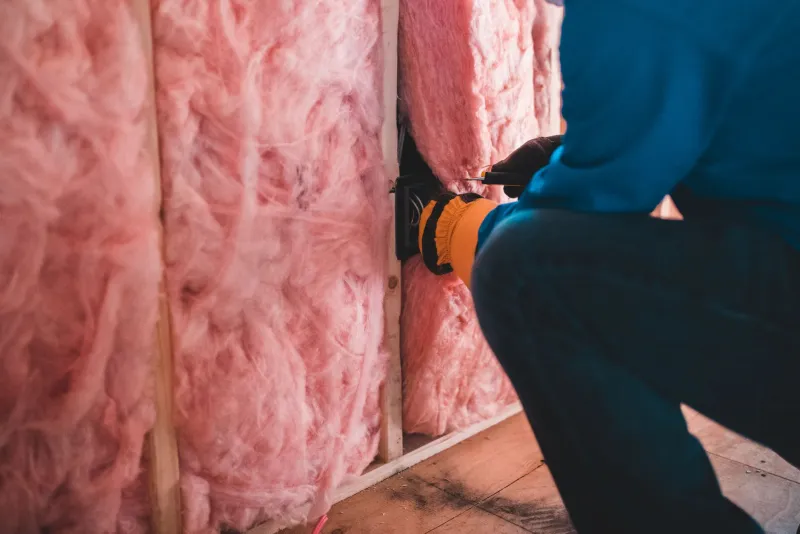
Step 3: Choose your insulation type. Blown-in cellulose or fiberglass are the most practical choices for DIY attic work. Both are available at major home improvement stores, and most locations will loan or rent a blowing machine when you purchase enough bags.
Step 4: Protect your ventilation. Make sure attic vents and soffit channels stay clear. Blocking ventilation while adding insulation creates moisture problems that are far more expensive to fix than the energy savings are worth.
Step 5: Suit up properly. Attic work is dusty, itchy, and hot. Wear a respirator rated for particulates, safety glasses, gloves, and long sleeves. Don't skip this part.
One More Thing Before You Climb Up There
If your home was built before 1980, have someone check for vermiculite insulation before you disturb anything. Some vermiculite products from that era contain asbestos, and that's a situation that requires a licensed professional, not a weekend project.
For newer homes or recently renovated attics, you're almost certainly in the clear — but it's always worth knowing what you're working with before you start.
The attic isn't the most exciting room in your house. But it might be the most financially consequential one you've been ignoring. A few hundred dollars and a Saturday afternoon could be the difference between heating your home and heating the sky above it. That's a trade worth making.